Set up your Product Insights Panel
Last updated: June 8, 2026
Publishing the Product Insights Panel takes five steps inside Light Labs, plus pasting a short snippet onto your product page. This guide covers the inline panel, which is the most common display. The same setup applies to the other displays.
Before you start
Make sure the product you want to publish has at least one completed test in Light Labs. The panel only appears once a product has results to show.
Tip: Want to see how it looks before your own results are ready? You can preview with example data using company-id="1", then switch to your own company ID before going live.
Step 1: Open the Product Insights Panel settings
Go to Products and click into the product you want to publish. Click the product itself, not an individual variant.
Select Product Insights Panel from the product menu. This opens the setup page for that product.
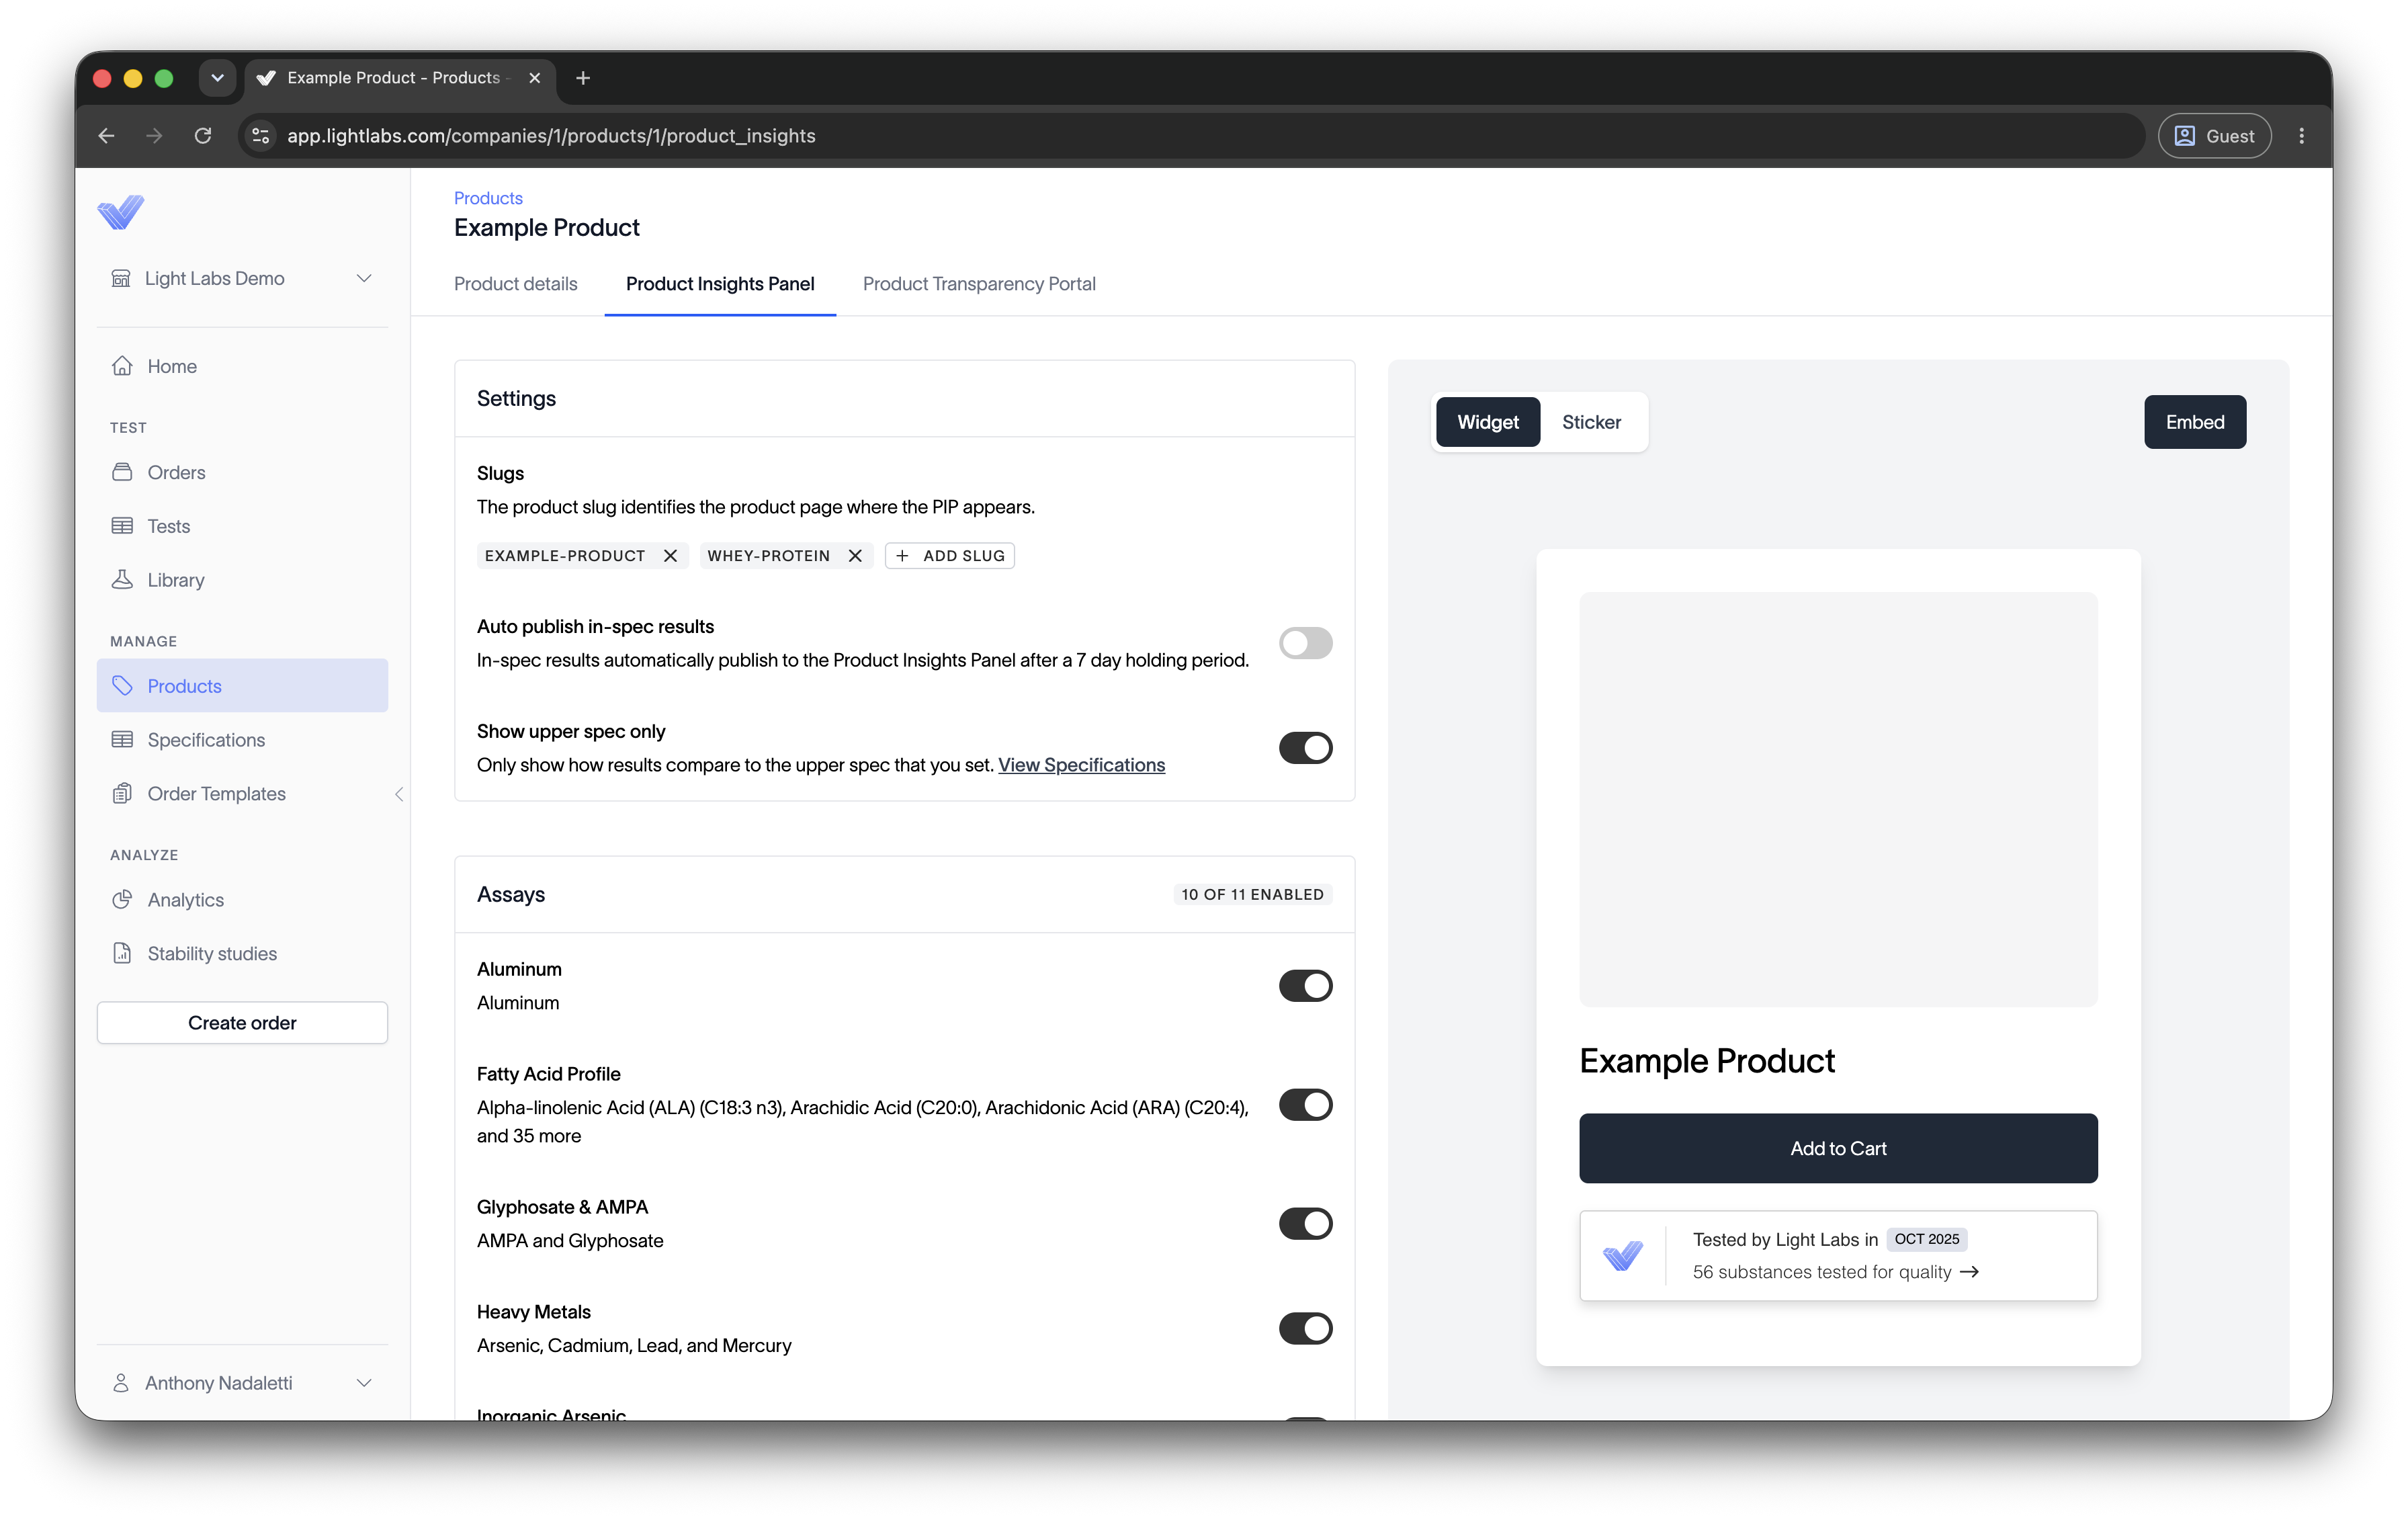
Step 2: Choose which tests to display
Toggle on the test category you want to show, for example Heavy Metals or Phthalates.
Scroll to the tests section and toggle on the specific tests you want displayed for that product.
You can enable whole tests or panels, not individual analytes. For example, if you enable Heavy Metals, you cannot choose to show lead while hiding the other metals in that panel.
Step 3: Confirm your results are in spec
Each result shows a status:
In spec (green): the result meets the limit you set.
Out of spec (red): the result did not meet your limit. We recommend you do not display these.
No spec (green): no limit is set, but the result is still shown.
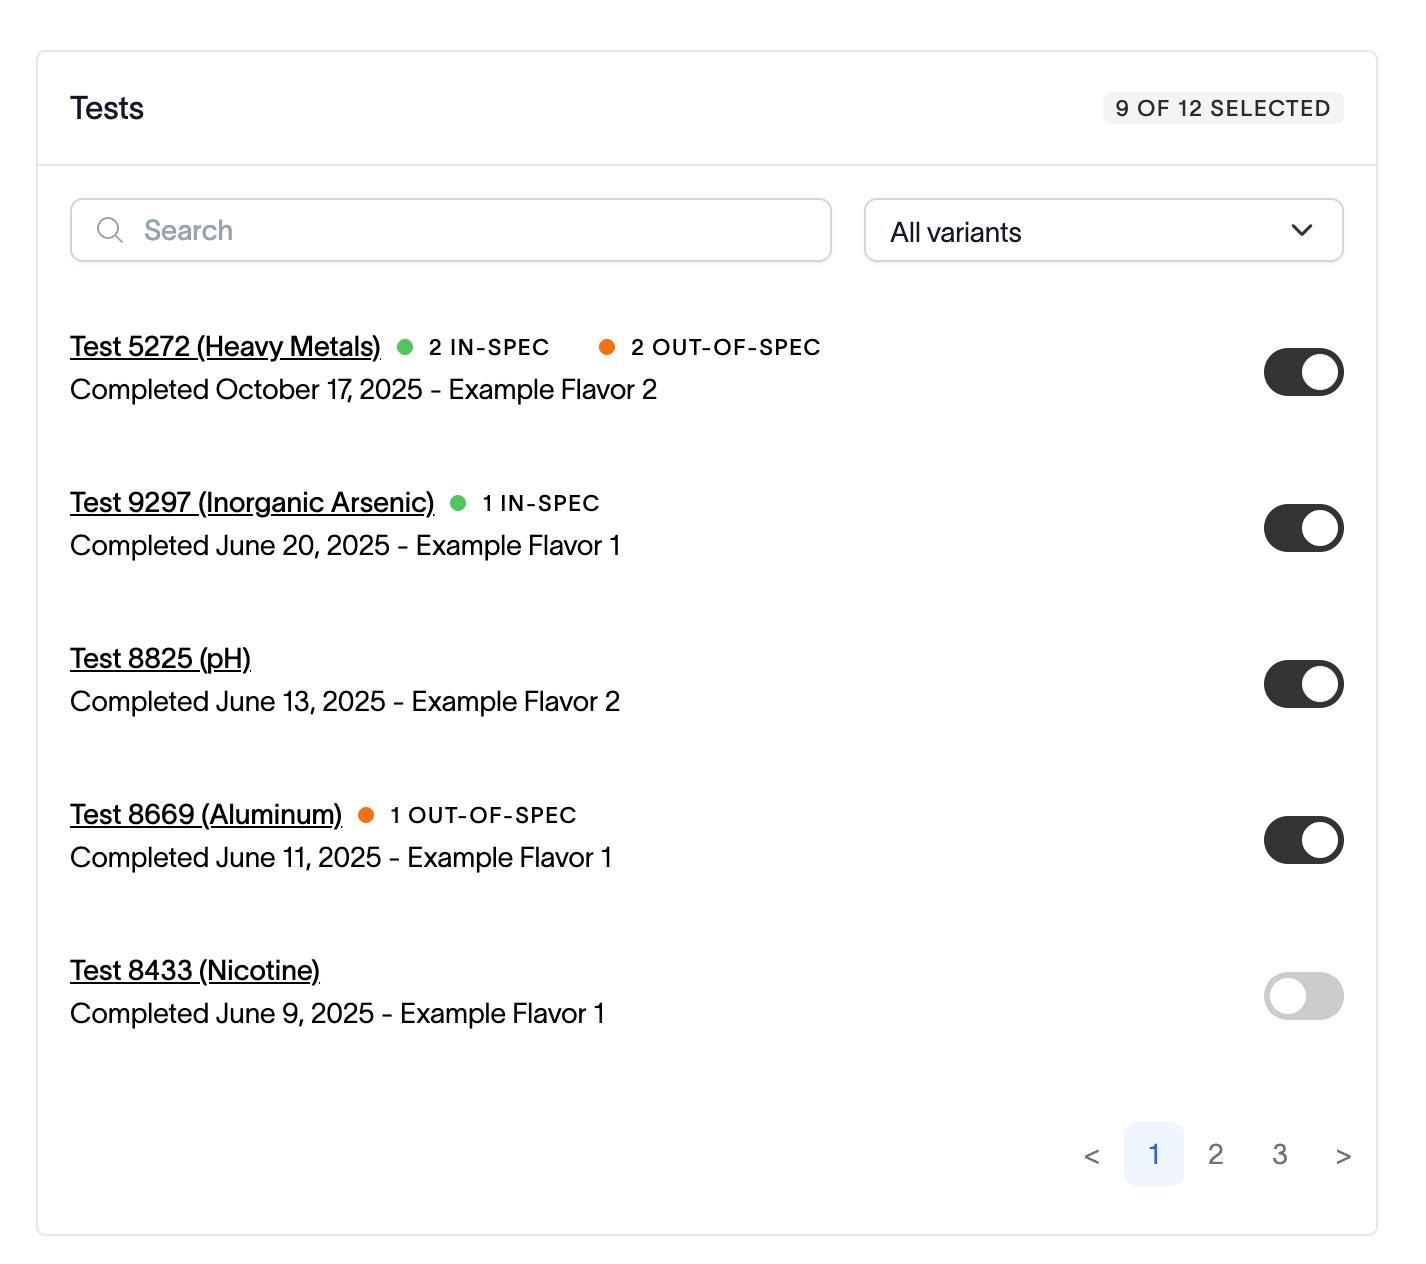
Only enable tests you are comfortable showing publicly. See 📄 How shoppers read your resultsfor how each status appears to shoppers.
Step 4: Add your product slugs
A slug is the part of your product page URL that identifies the product. For example, in yourstore.com/products/whey-protein, the slug is whey-protein.
Click Add slug and paste in the slug for the product page where this panel should appear.
Save.
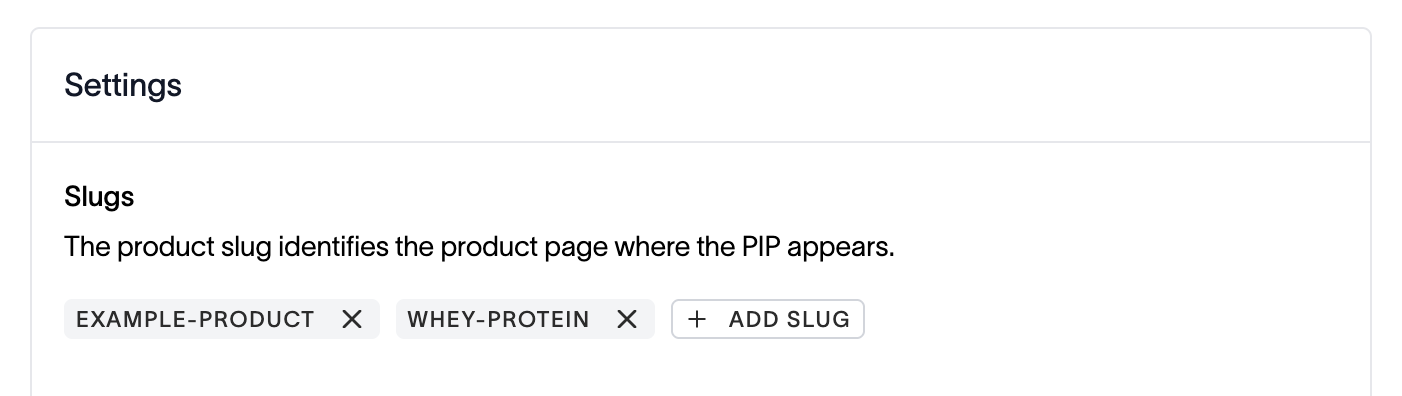
Notes:
You can add multiple slugs if the same product appears at more than one URL.
Without a slug, the panel will not appear on your product page. The slug is how the panel knows which product to show on a given page.
Important: The slug must match the product page URL. On pages that are not standard product pages, such as landing or bundle pages, slug matching does not apply. See 📄 How products are matched to pages
Step 5: Embed the code
Click Embed to open the code snippet.
Copy the two lines provided:
Add the first line, the script tag, to the
<head>of your site.Add the second line, the panel element, wherever you want the panel to appear on the page. Most brands place it just below the buy button.
Save your changes.
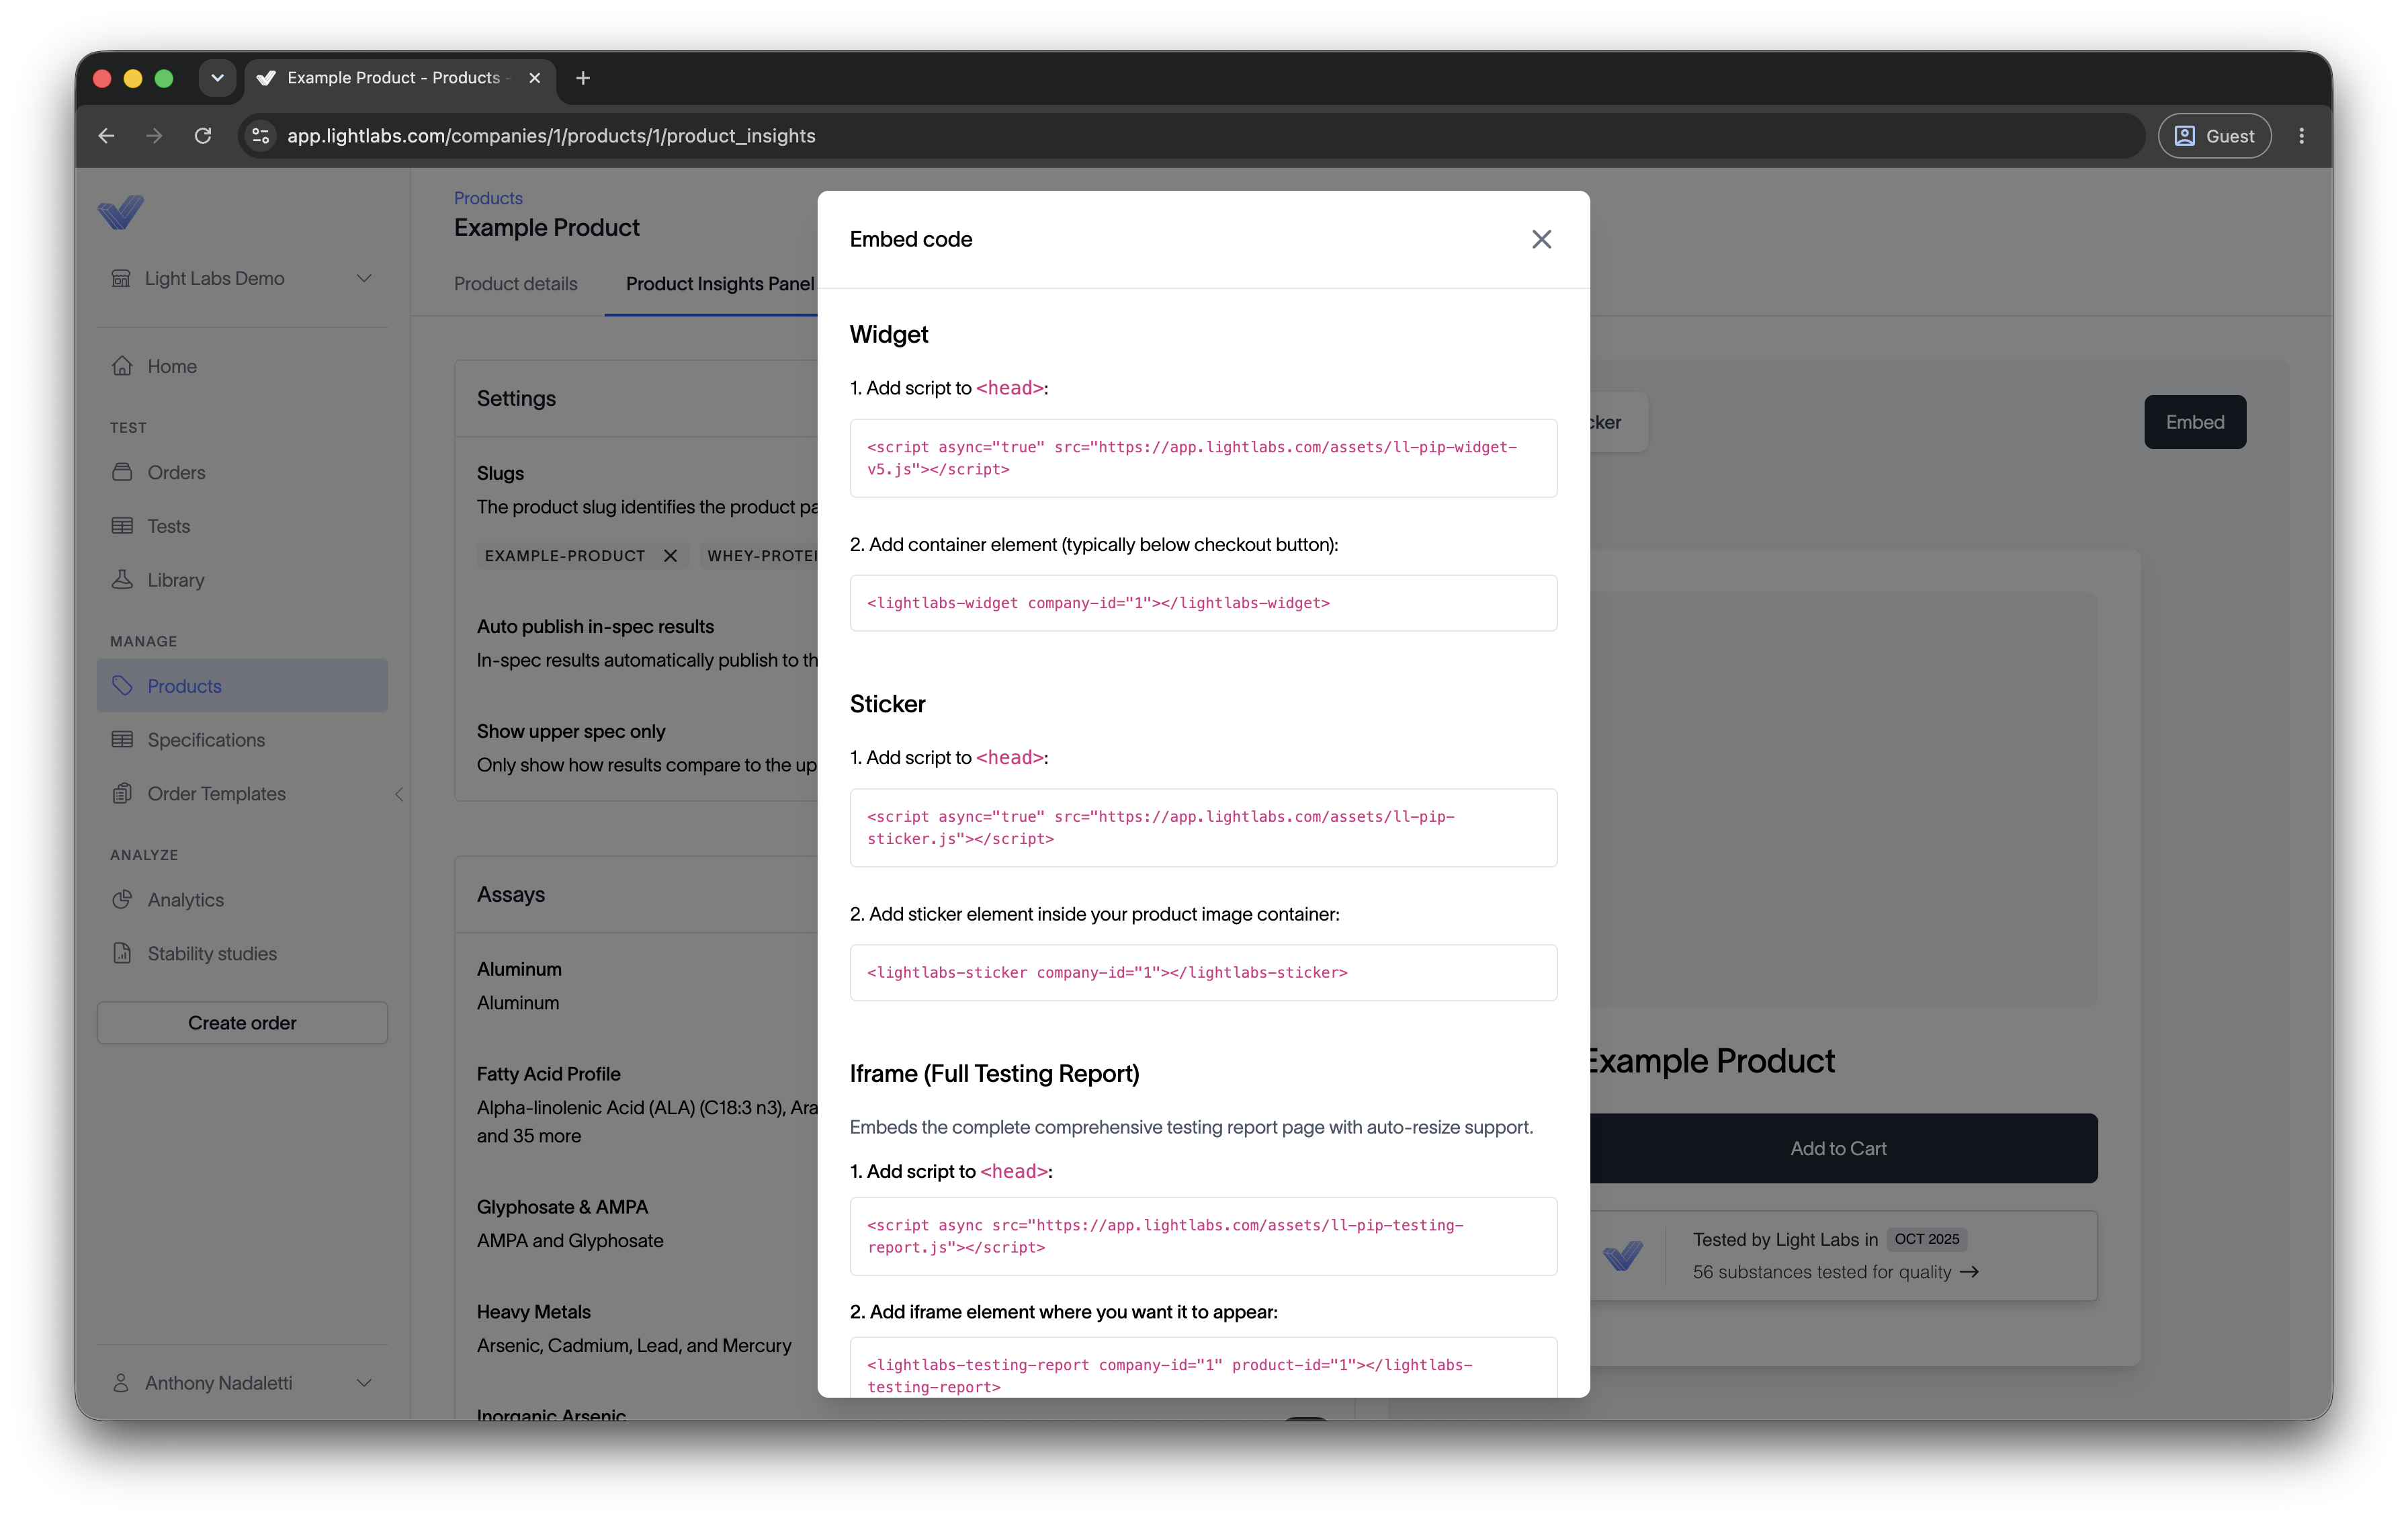
On Shopify, add a Custom Liquid block to your product page template, paste both lines into it, and save.
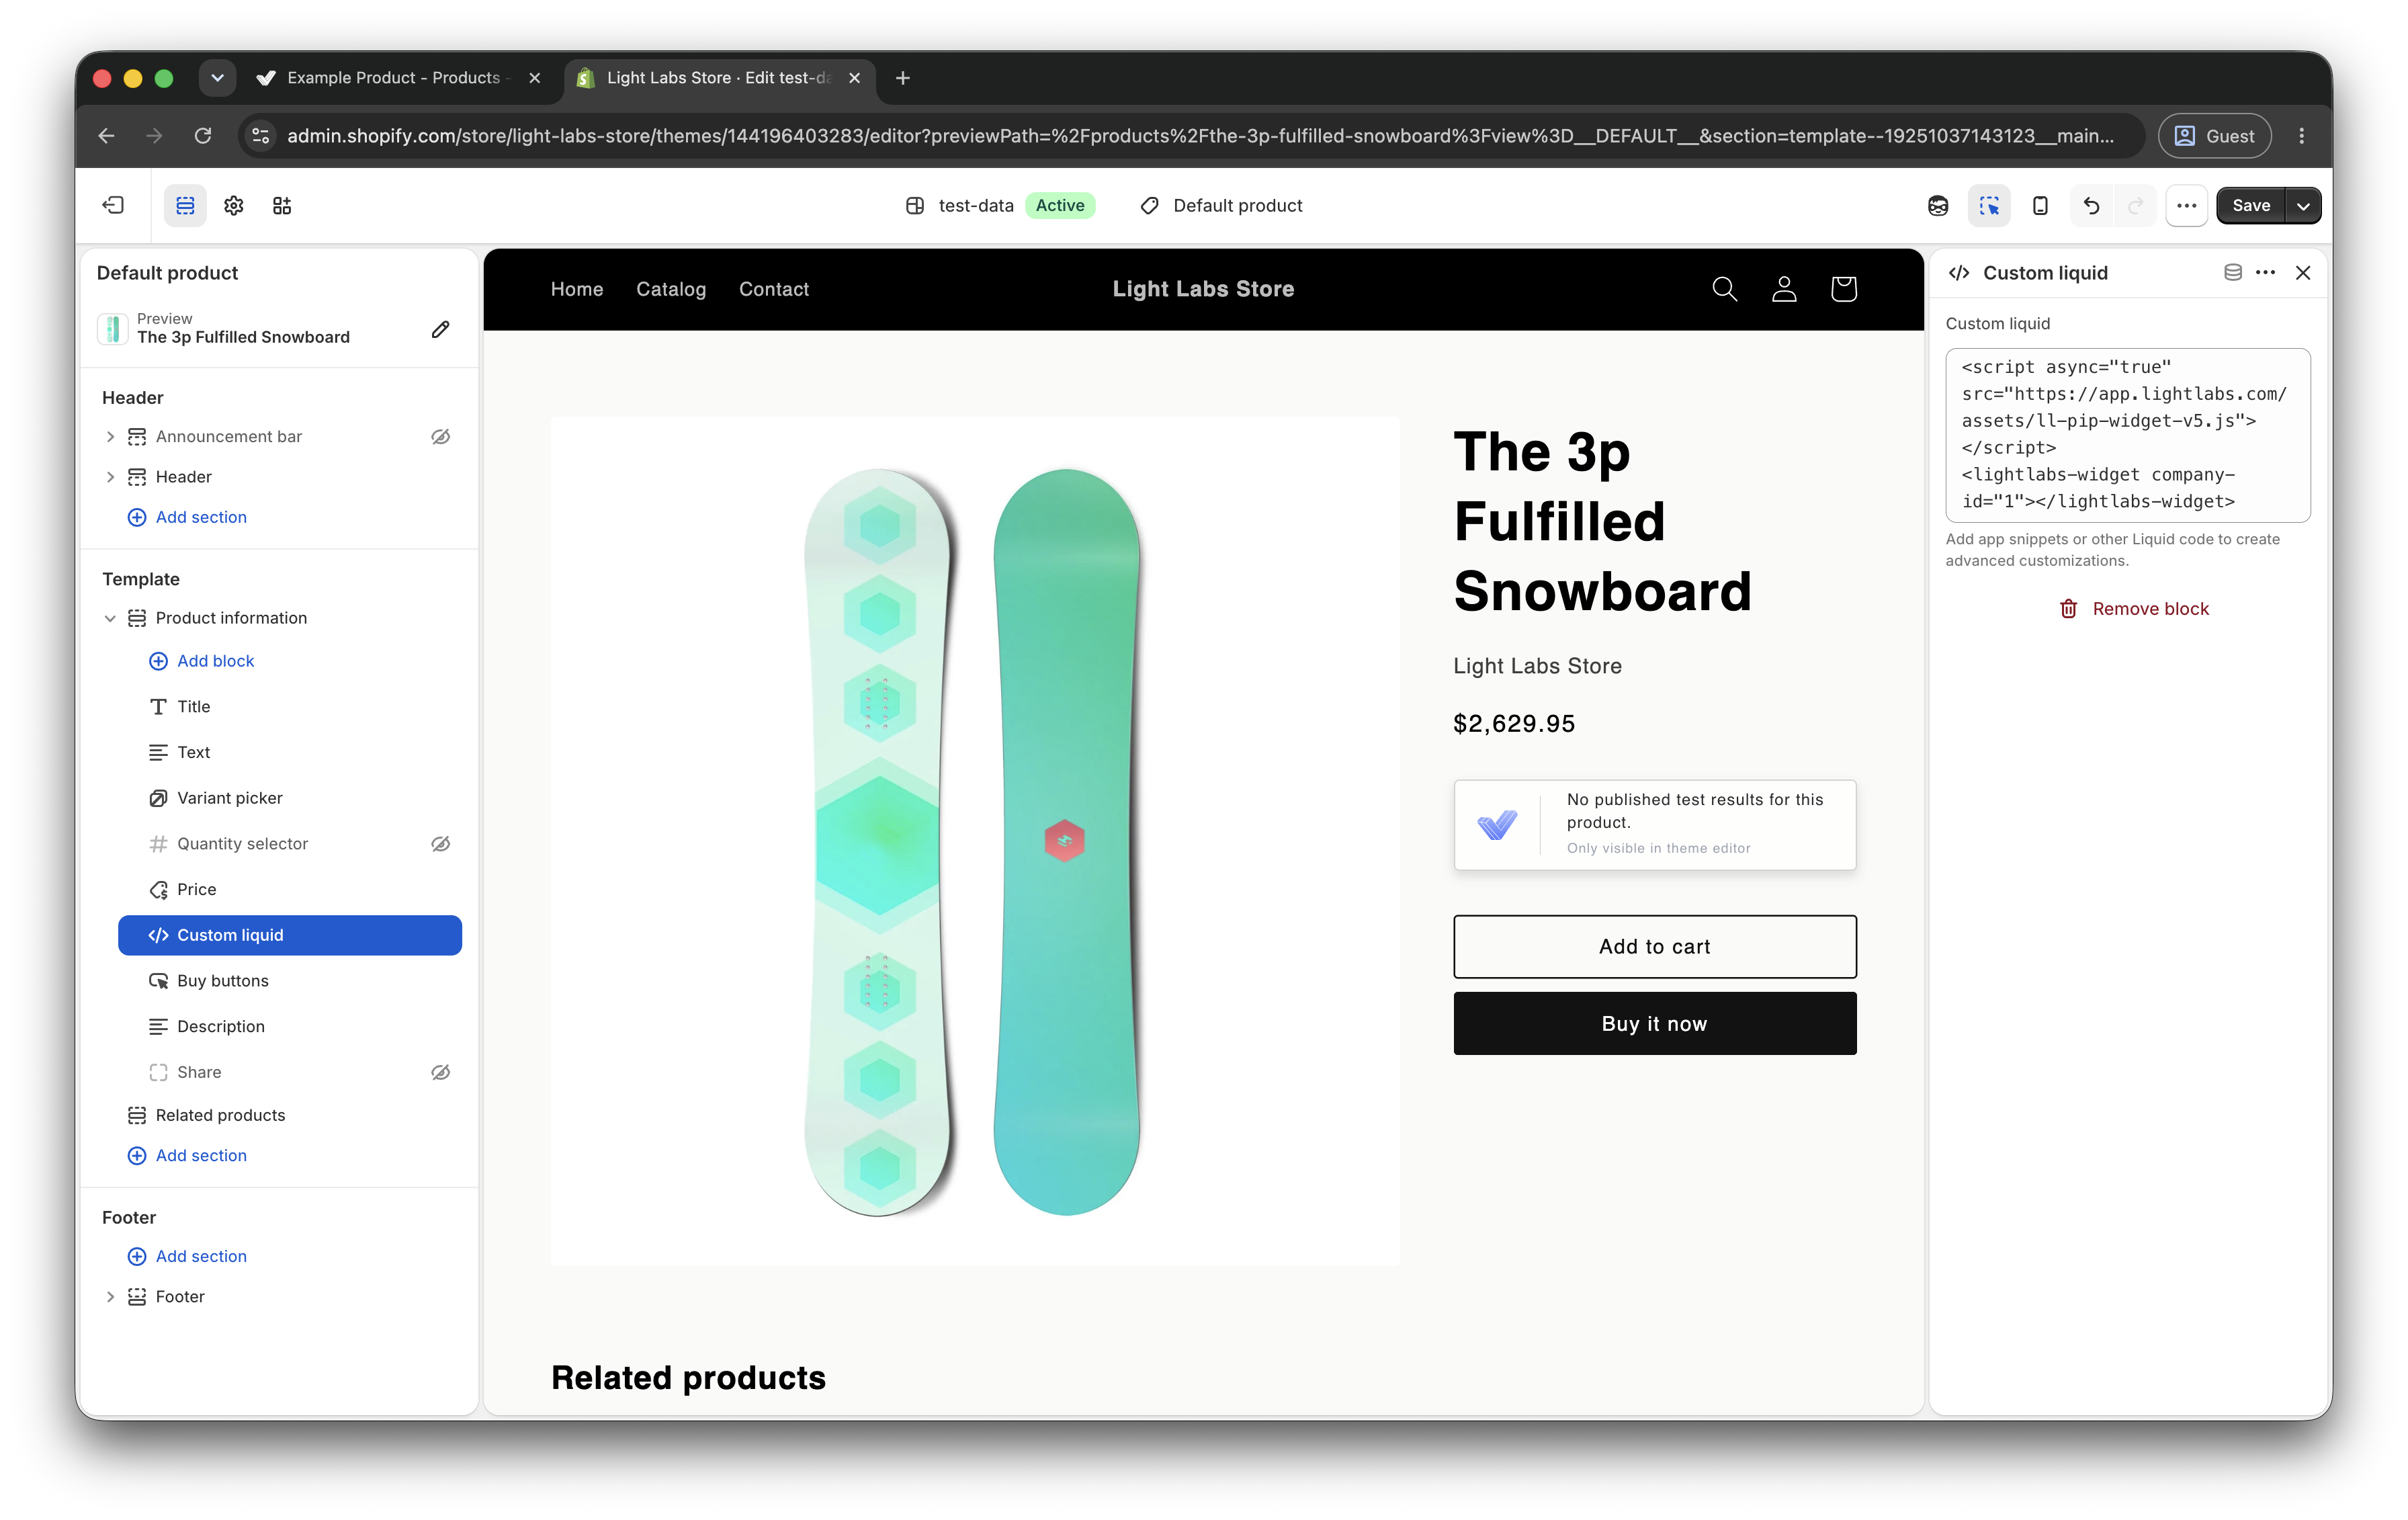
What you see in the Shopify theme editor
Inside the theme editor, the panel does not show live results. It shows a short placeholder message with the note "Only visible in theme editor." This is expected, not an error.
The theme editor is a preview environment. The page you are previewing is not your final, published product page, so the panel cannot match a product to it the way it will on your live store. Rather than show nothing, it displays a placeholder so you can confirm the panel is installed and see where it will sit.
You may see one of two messages:
"No published test results for this product." The panel found the product, but it does not have any enabled, published tests yet. Enable at least one in-spec test as described in Step 2.
"Unable to match a product on this page." The preview is not on your live product page URL, so the panel cannot match one of your product slugs. This resolves on the live page, where the URL is the real product URL.
In both cases the placeholder is visible only to you, only in the editor. To confirm everything is working, save your changes and open the live product page in a normal browser tab. If your slug is set up correctly, the panel renders automatically there and goes live immediately.
After you publish
Results come straight from your COAs. There is nothing to re-upload.
You can move the panel anywhere on the page by moving the embed code.
Removing a slug removes the panel from that page.
When you publish new testing in Light Labs, the panel updates on its own.
If the panel does not appear, see 📄 Troubleshooting.