Choosing which results to show
Last updated: June 8, 2026
You control exactly what appears on your Product Insights Panel. This article covers how to choose which tests are shown, what the spec statuses mean, and the two product settings that change how results are published and displayed.
Everything here is set per product, on that product's Product Insights Panel page in Light Labs.
Enabling tests
Results only appear once you turn them on:
Toggle on a test category, for example Heavy Metals or Phthalates.
Toggle on the specific tests within it that you want to display.
You enable whole tests or panels, not individual analytes. If you enable Heavy Metals, all of the metals in that panel are shown together. You cannot show lead while hiding cadmium within the same panel.
A product needs at least one enabled test before its panel will display anything.
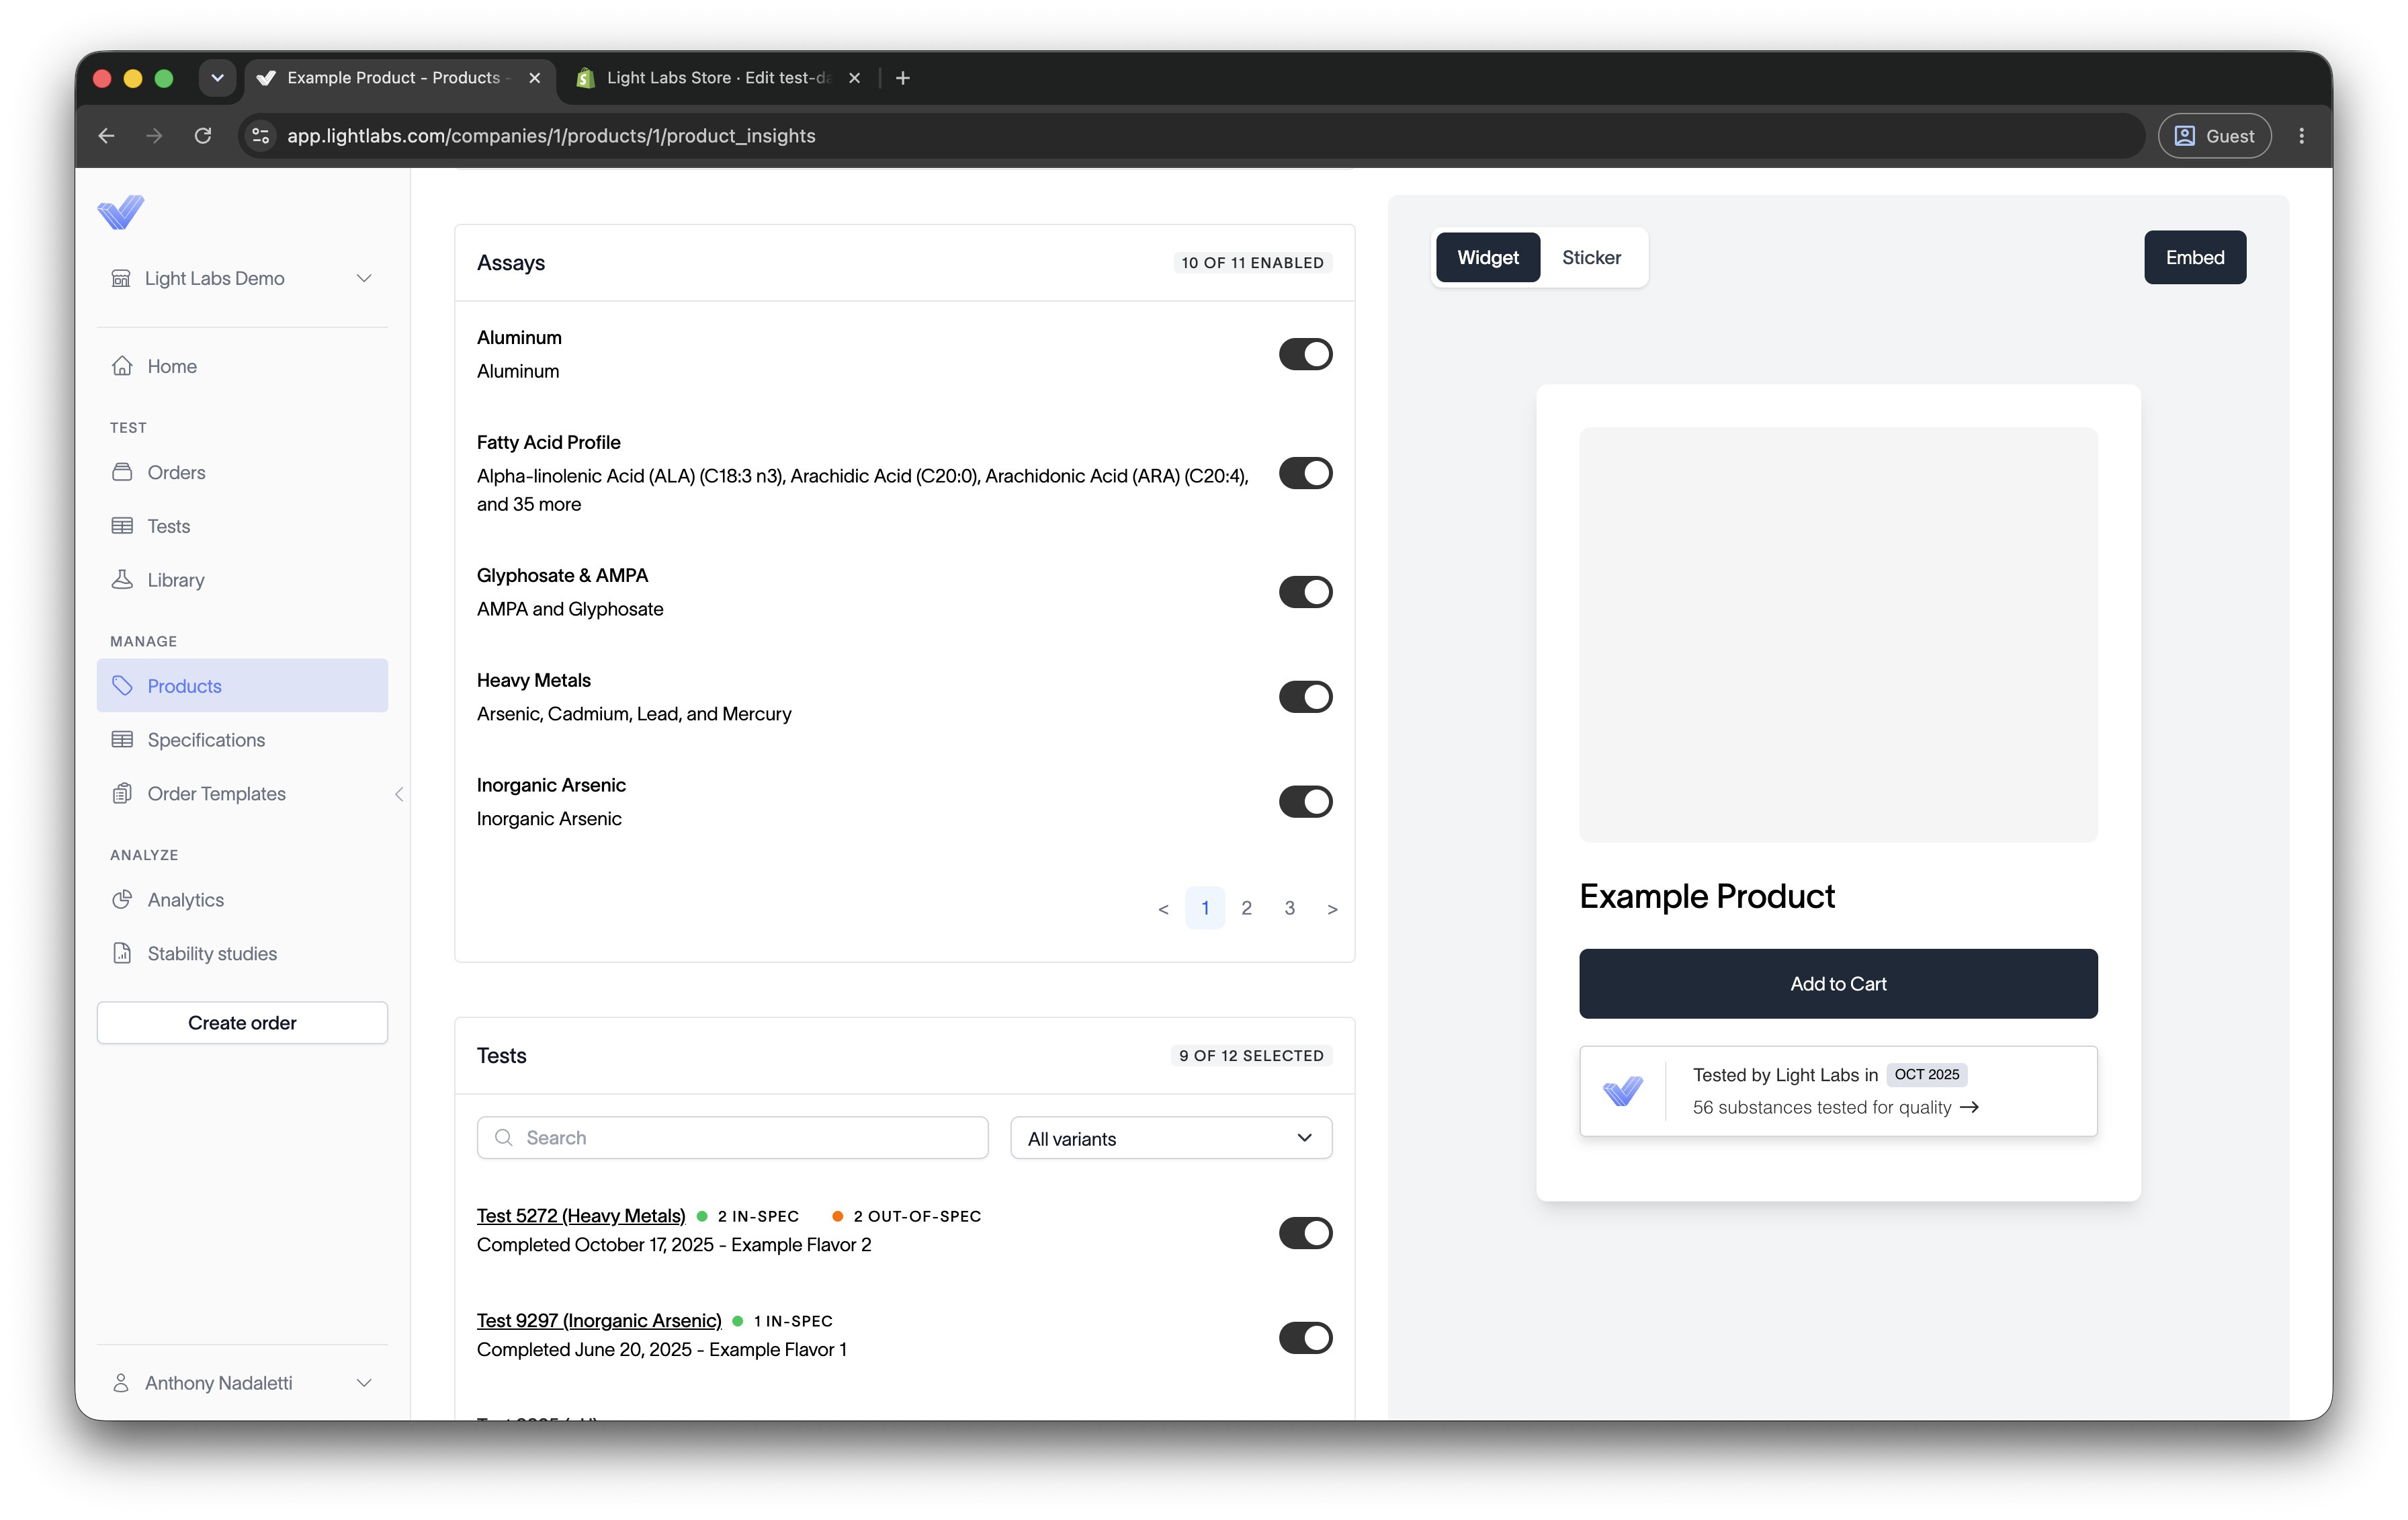
Understanding spec status
Each result carries a status based on the limits, or specs, you set:
In spec (green): the result meets the limit you set.
Out of spec (red): the result did not meet your limit. We recommend you do not display these.
No spec (green): you have not set a limit for this analyte, so there is nothing to compare against, but the result is still shown.
The limits you set are what drive these statuses. If you want to set or change limits, manage them in your Specifications.
Note: If you enable a test that contains an out of spec result, that result still appears on the full report, marked differently from passing results, and it does not count toward the substances tested total. Only enable results you are comfortable showing publicly. See 📄 How shoppers read your results
Product setting: Auto publish in-spec results
On the product's Product Insights Panel page there is a toggle called Auto publish in-spec results.
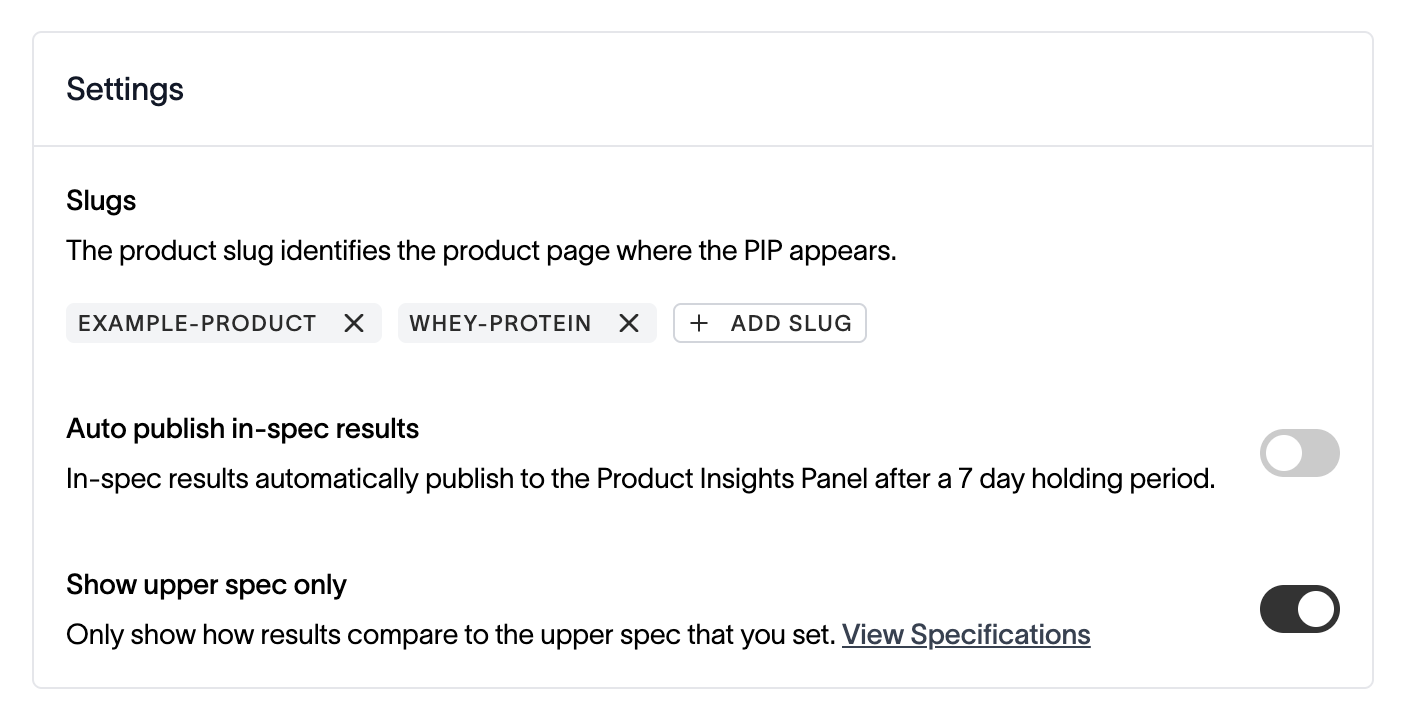
When it is on, a test publishes to your panel automatically once all of its results are in spec, after a 7 day holding period from when the test was published in Light Labs. The holding period gives you time to review a result, reissue a COA, or correct a serving size before it goes live.
What to know:
It only auto publishes tests where every result is in spec. Tests with any out of spec result are never auto published.
Anything you have manually hidden stays hidden. Auto publish will not re-enable a test you turned off.
It is per product, so you can enable it for products you are confident about and leave it off for others.
When the toggle is off, you publish each test yourself by enabling it as described above.
Product setting: Show upper spec only
The second toggle is Show upper spec only.
By default, the panel shows the actual amount detected for each result. When you turn this on, the panel instead shows how the result compares to the upper limit you set, for example "below your limit," rather than the exact measured value. Some brands prefer this when they would rather communicate "within our standard" than publish a precise number.
This setting relies on the limits in your Specifications, so set those first.